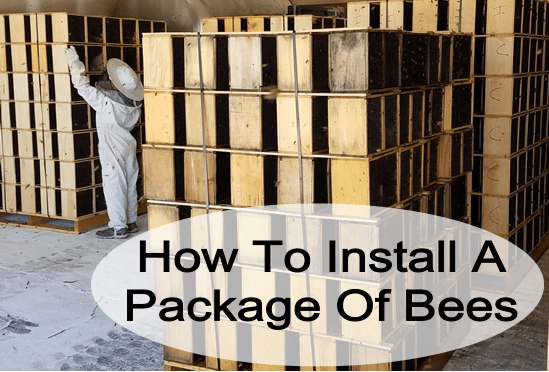
What options do you have for installing package bees?
There are several different options to consider when choosing your package bees. First, choose the type of bees that you want. The most common available are Italian and Carniolan. Bee packages generally come in sizes of 2 lb., 3 lb., and 4 lb. The 2 lb. and the 3 lb. packages will each have their own queens caged inside the package. The 4 lb. packages will come with one queen, or the option of two queens to split your package.
The 2 lb. and 3 lb. packages are the most common sizes to use when starting your colony. The 2 lb. package contains the minimum amount of bees that will be needed to get your colony built up correctly, and it is usually bought because of its lower price. The 3 lb. package is the most widely used size and the most readily available to buy. The extra pound of bees will give your colony an added boost to get them ahead quicker after installing them. (Each pound of bees = one frame covered with bees)
The 4 lb. package of bees with one queen will give you the biggest population when starting packages. The purpose to the 4 lb. package of bees with two queens is so that you can divide the package between two colonies and have a queen for each, so instead of starting one hive, you will be starting two.
Installing package bees is actually a very simple process that can be done in two different ways.
Method 1: Crawl In Without Shaking
First, set up a single box with frames on a bottom board with an entrance reducer installed and lid and inner cover removed. If you are going to use a frame feeder, make sure you have it installed and full of feed at this point. Have an empty box without frames sitting beside the hive ready to place over the package. NOTE: If you are using a 6-5/8" hive setup, you will need 2 empty 6-5/8" boxes to place over your package.
Set your packages next to the hives that they will be installed in. Next, remove the syrup can and carefully pull the queen cage out by the metal strip that she is hanging on. You need to handle the queen with care, the less stress that she gets the better off she will be. Look at her inside the cage and verify that she is alive and moving around. While you are inspecting the queen, you will need to cover the hole in the package so the bees can't come out. There will always be some bees that do fly out when you take the syrup can and the queen out, but the more bees that you keep in the package during this time, the better.
Next you need to remove one of the cork plugs in the end of the queen cage and quickly cover the hole with your finger. The queen will be ready to come out when you take the plug out, so be careful that you don't hurt her, or let her fly off because you will not be able to find her again. Carefully fill the hole with fondant or a mini marshmallow, to give the bees more time to acclimate to the queen while they chew through. Hang the queen cage between the frames in the middle of the box with the metal strip hooked over the top bar so the cage can't fall down between the frames. Next you need to quickly place your package of bees upside down with the hole open and directly over the queen cage so the bees will be drawn out of the package by the queen in the box.
Next put the empty bee box that is sitting beside your hive over the package on top of the other box. Quickly install the lid and inner cover to keep as many bees inside the hive as you can. The bees have been stuck inside the package for a day or two, so they will want to fly right away for a cleansing flight. You will want them to come out of the hive entrance because this is the place they will know to come back to.
After a day or two, remove the empty package and queen cage. Make sure the queen is not in the cage. You may have to shake a few of the bees out of the package if they are still in there. Remove your empty box and install the lid and inner cover on top of your first box.
Method 2: Shake In
This method is usually used in commercial application, or multiple hive setups because it takes less time. This method generally needs two people working together to do it, because it goes so fast.
First, set up your hives where they will be all year long. NOTE: you only need to start your bees out in one box. Make sure that the entrance reducer is installed. Remove the lid, inner cover, and the 3 middle frames from all of your hives and have them sitting to the side. If you are going to use a frame feeder, have it installed and filled with feed at this point.
Set all of your packages next to the hives that they will be going into. Next, start installing your packages, one hive at a time. Pull out the syrup can and carefully remove the queen cage by the metal hanging strip. Cover the hole in the package while you inspect the queen and verify that she is alive and moving around. Next, turn the package upside down over the empty space between the frames in the middle of the hive and shake the bees. Sometimes you have to shake the package side to side or tap the sides to get all of the remaining bees out.
Carefully and quickly replace the 3 frames into the middle of the hive, being careful not to smash the bees. NOTE: this is where it helps to have two people working together; one to shake the bees in and install the frames, and the other to get the queen cage ready for installation. To prepare the queen for installation, remove one of the corks and quickly place your finger over the hole. The queen will be ready to come out, so you need to be careful that you don't harm her or let her fly away. Carefully fill the hole with fondant or a mini marshmallow, to give the bees more time to acclimate to the queen while they chew through. Hang the queen cage between the frames in the middle of the box with the metal strip hooked over the top bar so the cage can't fall down between the frames.
Quickly place the lid and the inner cover on the hive so you keep as many bees in the hive as possible. This will make the bees come out of the entrance for their cleansing flight after being inside of the package for a couple of days, and this way they will know where to go back into the hive at. After a couple of days, check to make sure the queen has come out of the queen cage, and remove it from the hive.
4 lb. packages with 2 queens are installed in a different manner using the shake method. First, have two hive setups ready, with the entrance reducers installed, and the lids, inner covers and 3 middle frames removed and set to the side. If you're using frame feeders, have them installed and filled with feed at this point. Next, remove the queen on the outside of the package, or if you have bought an extra queen for this package, set her by the other hive. Then, remove the syrup can, and remove the other queen that's hanging inside the package by the metal strip. NOTE: at this point, it helps to have 2 people working together because of the speed at which this needs to be done to prevent drifting.
The person shaking the bees needs to shake half of the bees into the first hive. The second person needs to quickly install the 3 frames back into the hive, being careful not to squash the bees. Carefully remove the cork from one side of the queen cage. The queen will be ready to come out, so quickly cover the hole with your finger, being careful not to harm the queen or let her fly away. Hang the queen cage by the metal strip between the frames in the middle of the box with the metal strip hooked over the top bar so the cage can't fall down between the frames. Don't remove your finger from the hole until the cage is hooked securely to the frame in the box. Install the inner cover and lid quickly. Move to the next hive and repeat the process again with the other remaining half of the package bees.
After a couple of days check the queen cages and make sure the queen has gotten out. Remove the queen cages from the hives.
This sums up how to install the different sizes of package bees using the two most common methods.
Definition Of Honey Bee Drifting:
When bees are first installed in hives from packages, or when multiple bee hives are moved from place to place, bees can become confused and will not know which hive they have come out of, and will return to the wrong hive. This will add more bee population to other hives, usually the hives on the ends.
From all of us here at Lappe's Bee Supply and Honey Farm LLC


